Stewed Peas (Meatless)

I love legumes and turn to them whenever I feel like taking a break from meat. Mostly, I make stewed peas, which is red kidney beans that’s cooked with spices and coconut milk.

Traditionally you make stewed peas with meat – pig’s tail, corned beef or pork, or chicken. But a few years ago, perhaps as a result of the popularity of the Rastafari’s ital way of cooking, which excludes meat, a meatless variation started cropping up on restaurant and cook shop menus.

Stewed Peas (meatless)
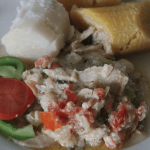
Stewed peas with brown rice and salad

But you don’t have to be vegetarian to like meatless stewed peas. Red kidney beans are so flavorful, you can enjoy it as a meatless stew or soup without much loss of flavor.

Making stewed peas

Soaking the peas overnight reduces cooking time. But if you’re unable to and have a pressure cooker, you can have them cooked in about twenty minutes. I love having a pressure cooker handy precisely for this reason.

The main ingredient in stewed peas is red kidney beans. As I explained in a previous post, what we call peas are really beans so I apologize for any confusion. Sometimes, I add carrots and spinners or potatoes, other times just carrots, especially when I’m watching my sugar intake as spinners (long dumplings) and potatoes raise blood sugar. Carrots can too, so keep that in mind if you’re diabetic.

For seasonings, I use scallion, thyme, Scotch bonnet peppers, pimento berries, garlic and a few thinly sliced strips of ginger. I love slightly sweet taste that coconut milk adds to any dish but you can leave this out if you prefer.

Stewed Peas (Meatless)


Write a review

Print

Ingredients
  1. 1 or 2 cups peas
  2. 1 or 2 medium carrots (chopped)
  3. 1 sprig of thyme
  4. 1 stalk of scallion
  5. 1 Scotch Bonnet pepper
  6. 1 tbsp. Pimento Berries
  7. 2 cloves garlic
  8. 1 small Irish potato (optional)
  9. 1 can coconut milk (optional)
  10. 2 Bay leaves (optional)
  11. Water – enough to cook peas
  12. Salt and freshly ground black pepper to taste
  13. Spinners (long, thin dumplings - optional)
Instructions
  1. Pick out defective or broken peas and wash. Soak overnight. The next day, drain off the water, pour peas into a pot, cover with cold water, add garlic and salt to taste and put to boil. (If you’re unable to soak peas overnight, wash, add enough cold water to cover and put to boil.)
  2. Cook for about an hour or until peas are soft.
  3. Add seasonings – pimento, scallion, Scotch Bonnet, black pepper, and coconut milk.
  4. Peel, chop and add potato and carrots.
  5. Add thyme, and Bay leaves (tie together with kitchen twine or put in cheesecloth). Cover and let simmer for about an hour or until you have a nice, thick stew.
  6. Remove Bay leaves, thyme and pimento berries before serving.
InsideJourneys https://insidejourneys.com/

Stewed peas is really an abbreviated version of red pea soup. It is always served with white rice but it’s just as great with brown rice, and greens – steamed callaloo, spinach or broccoli, or a garden salad.

How to Join the FoodieTuesday Linkup

Join the FoodieTuesday linkup by –

  • Posting a foodie photo on your blog
  • Adding the link to your foodie post in the link tool at the bottom of this post
  • Leaving a comment
  • Tweeting this post using the hashtag #FoodieTuesday

Hope to see you at FoodieTuesday!

 Loading InLinkz ...


Simple, Tasty Bully Beef (Corned Beef)

Last weekend, I had such a craving for bully beef and rice that I decided to make it for dinner. As I was chopping up the onions, scallions and tomato, I began thinking. Why is it called bully beef? Why is it red? How did it get to Jamaica? And why do we love it so much?

Bully beef is how we English speakers say beouf bouilli, which is French for boiled beef. It’s the brisket cut that is cooked in brine, shredded, and canned (think Spam) with a coat of gelatin or crystallized oil that melts when you cook the beef.

Bully beef was, until 2009, part of the rations that British soldiers received. I suspect the reason for its popularity in Jamaica and the Caribbean might be that the men who fought during the war brought it with them when they returned home. 

Bully beef and rice
Bully beef and rice

Bully beef is the name that was popular back in high school, when we made and sold bully beef sandwiches to raise money for our graduation. Corned beef is what almost everyone calls it now. But it’s not the same corned beef that’s a favorite of Irish and Jewish diners.

Once in a while we’d have bully beef for breakfast and sometimes, with white rice for dinner but it wasn’t a staple in our home. I can’t remember how my graduating class agreed to use it to raise money and considering how popular patties and coco bread were, I’m surprised we made money. But we didn’t have enough hands to sell those tasty little rolls that we stuffed with bully beef mashed with chopped onions, black pepper and mayonnaise.

Simple Bully Beef (Corned Beef)
Serves 4


Write a review

Print

Ingredients
  1. 1 Can bully beef (look for corned beef)
  2. 1 medium onion (chopped)
  3. 1/2 small Scotch bonnet pepper (chopped, seeded)
  4. 1 small tomato (chopped)
  5. 1 sprig thyme
  6. ½ sweet pepper
  7. Dash black pepper
  8. 1 can mixed vegetables or 1 cup shredded cabbage (optional)
Instructions
  1. Saute onions and Scotch bonnet until they become soft.
  2. Add chopped tomatoes, let cook.
  3. Open can of bully beef, stir it into the tomato, onion
  4. Add sweet pepper and other vegetables
  5. Season with thyme, and black pepper to taste
  6. Let cook for about 3-4 minutes.
  7. Serve with brown or white rice and your choice of vegetables.
InsideJourneys https://insidejourneys.com/

I had another memorable bully beef meal when five of my aunts and uncles turned up in the same city at the same time. The next morning for breakfast, my uncle’s wife fried up green plantains, which she masked with a fork, and bully beef.

That breakfast took my aunts back to their youth and that all started chattering not only about breakfast, which was a hit, but also about their mother and the women in their community used to make the best cakes, the best sweets. It was the first time I was having green plantains and was delighted how well it complimented the slight saltiness of the bully beef. Weeks after I returned home, I ate nothing but plantain and bully beef.

Bully beef is like Ramen noodles – quick, tasty, filling and, at the time, inexpensive. It’s also very versatile. I ate a lot of it after I got my first apartment. I’d make bully beef with cabbage, green or ripe plantains, dumplings, green bananas, even pasta.

Much of the bully beef that is on the supermarket shelves comes from South America. About two years ago, a US Department of Agriculture recall took it off the market. 

When the ban was lifted, the price jumped from roughly $3-4 to almost $6 a can. (In Jamaica, you can buy smaller sized cans for about $2-3.) That’s when I swore off bully beef. It made better sense to buy a pound of fish or even chicken instead. Maybe that’s why last weekend the taste came back so strongly.

I found two pages dedicated to Rice and Bully Beef on Facebook. Between them, they have almost 2,000 likes. Who knew so many people liked this simple dish?


How to Join the FoodieTuesday Linkup

Join the FoodieTuesday linkup by –

  • Posting a foodie photo on your blog
  • Adding the link to your foodie post in the link tool at the bottom of this post
  • Leaving a comment
  • Tweeting this post using the hashtag #FoodieTuesday

Hope to see you at FoodieTuesday!

 Loading InLinkz ...


Gizzada (Coconut Pastry)

I was out shopping with a friend a few weeks ago, when she stopped at a Jamaican restaurant in her neighborhood (more about that later) to pick up patties. A little take-away place, it had the standard Jamaican fare on the menu – rice and peas, curried chicken, brown stewed fish, etc.

I wasn’t very hungry but the pastries caught my attention, well one in particular: the gizzada, an open tart with a grated, spiced and sweetened coconut filling.

Gizzada
Pinch me round or gizzada

Also known as “pinch-me-round,” for the characteristic wavy look of the edges of the shell, the gizzada came to Jamaica from Portugal, where there’s a similar pastry, called guisada.

Portuguese Jews began arriving in Jamaica in 1530. They were fleeing religious persecution under the Inquisition, which ordered them to convert to Christianity. Jamaica became a refuge for Jews from Spain and Portugual, and by the mid to late 1880s, there were more than 2,000 Jews on the island. The gizzada is one of their contributions to Jamaican cuisine.

Gizzadas are pretty popular with Jamaicans. I remember eating them as a child, and there were always available at the cafeteria at school. They are also popular with Jamaicans abroad so I wasn’t surprised to see them at the restaurant.

I love gizzadas because of the combination of the textures and flavors – crunchy (shell) and soft (filling), the pungent taste of nutmeg and the spiciness vanilla, the sweetness of the filling against the plain tasting shell. Some recipes also use ginger.

Gizzada


Write a review

Print

Crust
  1. 1 cup baking flour
  2. 1/4 tsp salt
  3. 1 1/4 oz. butter or margarine
  4. 1/4 cup ice water
Filling
  1. 1 small coconut, grated
  2. 1/2 cup brown sugar
  3. 1/4 tsp grated nutmeg
  4. 1/2 vanilla
  5. 1/2 tbsp water
  6. 1/2 tbsp butter
Crust
  1. Preheat oven to 180 degrees C. Mix together flour and salt then cut in butter and shortening.
  2. Add ice water to form dough.
  3. Use fingers to blend mixture until it resembles coarse crumbs.
  4. Shape into a ball before wrapping in waxed paper and refrigerate for half an hour.
  5. Divide crust into 4 balls.
  6. Use a rolling pin to flatten balls into 3" circles of 1/4" thickness.
  7. Pinch edges to form a ridge to hold in coconut and sugar mixture.
  8. Put on greased cookie sheets and partly bake crust.
Filling
  1. Combine all ingredients except butter and cook over a low flame for about 20 minutes.
  2. Add butter then fill shells with coconut mixture and bake for a further 15-20 minutes.
  3. Makes 4 gizzadas.
InsideJourneys https://insidejourneys.com/


How to Join the FoodieTuesday Linkup

Join the FoodieTuesday linkup by –

  • Posting a foodie photo on your blog
  • Adding the link to your foodie post in the link tool at the bottom of this post
  • Leaving a comment
  • Tweeting this post using the hashtag #FoodieTuesday

Hope to see you at FoodieTuesday!

Nov 10, 2013 – Linking up with Monika Fuchs’ foodie carnival at Travel World Online.

 Loading InLinkz ...


Rundown or Dip and Fall Back

Cooking is as much about skill as it is about passion. Either of these on their own can produce a satisfactory dish; bring them together and you have a delicious meal.

My first attempt at making Rundown, or Rundung in our Jamaican dialect, was for a dinner party I gave. I approached the making of this mildly complicated dish armed only with an inflated sense of confidence. I’m sure I thought to myself, how difficult can it be to?

While I scored on the passion, I bombed on the skill. Fortunately, for me, my guests thought my Rundown was a hit.

Rundown is grated or shredded coconut that is boiled until it reduces to a thick, custard-looking consistency. At that stage, onions, pepper, tomatoes, garlic, thyme are added and allowed to cook before adding the fish, typically salted mackerel, cod or shad. Lobster or shrimp work perfectly as well.

Rundown – I haven’t been able to find out why it’s called that – also goes by an even more interesting name, Dip and Fall Back. According to the National Library of Jamaica’s website, Rundown was served traditionally in a bowl that was placed in the middle of the table. Each person at the table would dip something starchy, like boiled green bananas or dumpling, into the bowl then fall back to allow someone else to dip.

Communal eating, which might have been holdover from slavery, was likely brought back into play during the war when foods and other items were rationed and Jamaicans had to create other ways to feed their families.

Another explanation is that you dip and allow your head to fall back so that the sauce doesn’t drip. Whatever the reason, Rundown or Dip and Fall Back is a Jamaican classic. There’s even song, Dip and Fall Back, celebrating the dish. Listen to a mento version by The Spinners, a group that’s new to me, and a lively folk version by the Cari-Folk singers.

My mistake on my first try was that I didn’t let the coconut reduce enough before I added the seasonings. I didn’t have annatto seeds either, for that yellowish-red color but it didn’t matter because the meal was delicious. (Annatto is the food coloring that gives Chedder and other cheeses their characteristic reddish-yellow color.) Honestly, there really is no way to fail with anything cooked in coconut since it gives foods such a rich flavor.

I never tried Rundown until several years later. That time, I got it halfway right but I was careful not to say it was Rundown.

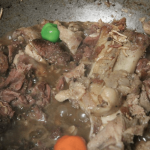
A few weeks ago, when I was cooking with my aunt, I asked her to help me make it. She didn’t have salted mackerel so we used saltfish instead. Above is how it looked. For the record, it was delicious.

Rundown or Dip and Fall Back
Serves 4
A traditional Jamaican dish


Write a review

Print

Prep Time
3 hr

Cook Time
20 min

Total Time
3 hr 20 min

Prep Time
3 hr

Cook Time
20 min

Total Time
3 hr 20 min

Ingredients
  1. 2 whole coconuts, grated or 2 cans coconut milk
  2. 1 clove garlic, chopped
  3. 2 -3 sprigs of thyme
  4. 6 cups water
  5. 3 stalks scallion, chopped
  6. 2 onions, chopped
  7. 2 lbs. pickled mackerel, saltfish or shad
  8. 3 tomatoes, chopped
  9. 1 hot pepper, Scotch bonnet, chopped and seeds removed
  10. 5-6 annatto seeds or a dash of turmeric (optional)
Instructions
  1. Soak the mackerel or shad in water for at least 3 hours to remove excess salt. You can also bring it to boil 2 or three times, throwing off the water and letting it boil again. Remove as many bones as possible and set this aside.
  2. If you're using shrimp or lobster, clean and set aside.
  3. If you’re using grated coconut, add water and press the liquid through a sieve, cheesecloth or muslin bag. This is the coconut milk.
  4. Boil the coconut milk rapidly in a heavy frying pan until it is reduced to something resembling curdled custard oil.
  5. Stir in the annatto or turmeric then add onion, garlic, scallion, tomatoes, hot pepper and thyme. Lower the heat and simmer for ten minutes.
  6. Add the fish and stir.
  7. Cover and cook for 10 minutes on a medium heat.
Notes
  1. This dish is traditionally served with boiled green bananas and dumplings. Sometimes the green bananas are cooked with it.
Adapted from National Library of Jamaica
InsideJourneys https://insidejourneys.com/

How to Join the FoodieTuesday Linkup

Join the FoodieTuesday linkup by –

  • Posting a foodie photo on your blog
  • Adding the link to your foodie post in the link tool at the bottom of this post
  • Leaving a comment
  • Tweeting this post using the hashtag #FoodieTuesday

Hope to see you at FoodieTuesday!


 Loading InLinkz ...


Pig Roast at G’s BBQ

I’d been hearing about pig roasts for months following my return to Jamaica in 2011 and wanted to go to one. I even went to a fund-raising event because I heard that they would have a pig roast. As luck would have it though, the year I went, the organization did not do the roast. I was disappointed. 

The practice of roasting a whole pig, usually a young pig between two and six weeks old, or suckling, has been around for centuries. Pig roasts are popular in several countries for large gatherings such as weddings and parties. The pigs are typically slow roasted on a spit over a wood fire, but a large oven can work as well.

Just when I’d given up on ever going to one, the pig roast gods smiled. My sister D, alerted me that G’s BBQ on Constant Spring Road in Kingston had announced one.

It was hard to keep my excitement in check as I counted down the days to the roast. When it finally arrived, our party of seven was among the first to take our reserved seats at the restaurant.

Pig Roast at G's BBQ
Roasted pig with green papaya slaw, mac and goat cheese and pickled red onions

As soon as the roasted pig arrived, Chef Gari began carving it then served us table by table. Several mouth-watering sides and sauces accompanied Chef Gari’s Whole Smoked Crackling Roast Pig, including Green Papaya Slaw, Pickled Red Onions, Hard Dough Rolls with Honey Butter, Smoked Sweet Potato, Mac & Goat Cheese, BBQ Onions, and Tangy Tamarind Glaze, Coconut and Lemon grass Sauce and Mango Scotch Bonnet Sauce.

I had the green papaya slaw, hard dough rolls with honey butter, and mac and goat cheese. Succulent on the inside, crispy on the outside, the pork harmonized perfectly with the medley of flavors. The orange-looking strips that look like fries are the papaya slaw.

Chef Gari is well-known around Kingston for his barbecue but his Whole Smoked Crackling Roast Pig had me going back for seconds, despite the promise I made to myself not to pig out.

G’s BBQ still does pig roasts, so if you’re in Kingston, be sure to check them out.

G’s BBQ
The Marketplace
67 Constant Spring Road
Kingston 10
Mondays-Saturdays, 12 noon to 10:30 p.m.
876-906-4393

Here’s a recipe for Jerk-Roasted Suckling Pig from one of my favorite cookbooks, Jerk Barbecue from Jamaica by Helen Willinsky.

Jerk-Roasted Suckling Pig
Serves 12


Write a review

Print

Ingredients
  1. 1 suckling pig, dressed and well cleaned
  2. Vegetable oil for coating
  3. Salt and freshly ground black pepper for sprinkling
For the Jerk Paste
  1. 4 onions, finely chopped
  2. 2 cups finely chopped scallions
  3. 4 tablespoons dried thyme leaves
  4. 1/4 cup salt
  5. 2 tablespoons ground Jamaican pimento (allspice)
  6. 1/4 teaspoon ground nutmeg
  7. 1 teaspoon ground cinnamon
  8. 4 Scotch bonnet or habanero peppers, seeded
  9. 1 tablespoon freshly ground black pepper
  10. 1/2 cup vegetable oil
  11. 4-6 cloves garlic
For the Stuffing
  1. 2 or 3 white potatoes, cooked and mashed
  2. 2 or 3 sweet potatoes, cooked and mashed
  3. 2-3 tablespoons butter
Instructions
  1. Preheat the oven to 350'F or 180' C.
  2. In a food processor, puree all the paste ingredients to make a paste.
  3. Rub the inside of the pig with the paste, reserving approximately one tablespoon to mix with the stuffing.
  4. Rub the outside of the pig with oil, salt and pepper.
  5. In a large bowl, combine the potatoes, sweet potatoes, butter and remaining one tablespoon jerk paste.
  6. Stir until well blended.
  7. Loosely pack the stuffing inside the pig and close the opening with skewers, or sew together with kitchen twine.
  8. Draw the legs back and tie with twine.
  9. Stuff the mouth with a piece of aluminum foil to keep it open as it roasts.
  10. Place the pig on a rack in a large roasting pan.
  11. Roast for 2 to 2 1/2 hours (15 minutes per pound) or until done. An instant read thermometer inserted in the thigh will register 165'F and the juices will run clear when you pierce the thigh with a fork or the tip of a knife.
  12. Remove the pig from the oven and place on a heated platter.
  13. Remove the foil from the mouth and replace it with an apple.
  14. Let the pig rest at room temperature for 10-15 minutes before carving.
Adapted from Jerk Barbecue from Jamaica
InsideJourneys https://insidejourneys.com/

A version of this post has appeared in JamaicanEats.

How to Join the FoodieTuesday Linkup

Join the FoodieTuesday linkup by –

  • Posting a foodie photo on your blog
  • Adding the link to your foodie post in the link tool at the bottom of this post
  • Leaving a comment
  • Tweeting this post using the hashtag #FoodieTuesday

Hope to see you at FoodieTuesday!

 Loading InLinkz ...


Auntie Birdie’s Pepperpot Soup

Traditions, such as how to prepare certain meals are generally passed from mother to daughter, the older women in the family to the younger ones. Though a very talented cook and baker, my mother never taught me how to cook.

By the time I was old enough to start learning, she’d passed the responsibility for preparing meals on to our helper, going into the kitchen only at Christmas to bake or when we expected company. Then she’d create elaborate meals, which were, of course, well beyond our helper’s capabilities.

Somehow, though, cooking came to me naturally — I can fix just about any meal. But when I decided to feature pepperpot soup for FoodieTuesday, I realized that I didn’t know how to make it.

Sure, I could have used a recipe from one of my cookbooks but that just wouldn’t do, not for pepperpot soup. Knowing how to make it made me think of those family traditions. So I emailed my sister and aunt. I wanted a recipe I knew someone in the family had used.

Auntie Birdie's Pepperpot Soup
A delicious, nutritious soup even George Washington liked.


Write a review

Print

Ingredients
  1. 1/2 lb. smoked or corned pork, pig's tail or salt beef, chopped in small pieces
  2. 1/2 lb. fresh beef (boneless, cubes)
  3. 3 cloves chopped garlic
  4. 1 onion (chopped)
  5. 6 cups water
  6. ½ lb. yellow (or other yam), 1 lb. cocoa or (2 medium green plantains peeled and chopped)
  7. 1/2 lb. cream of coconut (or 1 can coconut milk)
  8. 2 cups okra
  9. 1 hot pepper (Scotch bonnet pepper, chopped)
  10. 1/2 red pepper (sweet, chopped)
  11. 1 lb. callaloo/spinach, chopped
  12. ½ lb. cabbage chopped
  13. ½ lb. kale or mustard greens chopped
  14. 1lb flour (1/2 plain and ½ whole wheat) for dumplings
  15. Salt and black pepper, to taste
  16. 2 bay leaves
  17. 11/2 tsp. thyme (ground)
  18. 4 stalks escallions (chopped)
  19. 4 pinches nutmeg
Instructions
  1. In a large stockpot, add pork with a teaspoon of oil.
  2. Braise on medium heat to remove fat drippings.
  3. Pat the beef cubes dry.
  4. When enough drippings have been released, add the beef and sauté until brown.
  5. Add 6 cups of water, cover and let simmer for an hour. Skim off any foam that rises on the top and sides of the pot.
  6. Check meats for doneness then add all greens, including okra. Cook for ½ hour.
  7. Remove greens and puree in blender or food processor.
  8. Return pureed greens to pot. Add chopped onions, yam, coco, bay leaves, coconut, sweet pepper, beans and spices.
  9. Make spinners and add.
  10. Add scallions and other seasonings.
  11. Check taste and add a tablespoon of butter.
  12. Cook for another 15 minutes.
  13. Add shrimp during the last few minutes of cooking
  14. Spoon into a bowl, garnish with shrimp.
  15. Serve hot with rolls, slices of hard dough or other bread.
Notes
  1. Turkey or chicken can be substituted, or left out all together for a meatless soup.
  2. Meats can be pressure cooked.
InsideJourneys https://insidejourneys.com/

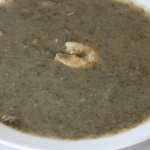
Pepperpot soup is made primarily callaloo, a leafy green vegetable that’s a close cousin to spinach, as well as taro leaves, kale and okra – though any green, or combination of, will do.

This mix of vegetables, meat and pepper, lots of it, make pepperpot a delicious and nutritious meal. So nutritious that George Washington had his cook prepare it for his troops. According to a post on Chef Walter Staib’s, A Taste of History, Washington was introduced to a version of the soup when he visited his brother, Lawrence, in Barbados in 1751.

When my aunt emailed me a recipe appropriately called, Aunt Birdie’s Pepperpot Soup, I wrote back immediately.  The recipe, she said, was similar to how she remembers the pepperpot soup that was made in her mother’s kitchen in rural Jamaica.

I knew right away that I wanted her to show me how to make it. I wanted to learn from someone who knew.

Auntie Birdie, my father’s youngest sister, is an accountant and fabulous cook who always shares stories about growing up “in the country,” as most Jamaicans call any place outside Kingston.

As she chopped the greens, Auntie Birdie, who was named after one of her mother’s sisters, reminisced. It certainly feels like life was simpler then, family life idyllic, the foods sweeter.

Most people cooked on a wood fire in a kitchen that was separate from the house, Auntie Birdie recalled. There was no refrigeration then so meats, primarily pork and beef, were cured, or smoked. The meat would be seasoned with pimento leaves and placed on a mesh, called a kreng kreng which hung over the fire. As meals were cooked with pimento woods, the smoke would slowly baste the meats and lock in the flavors. This smoked meat, along with a small amount of fresh beef, would be used in the pepperpot soup.

Auntie Birdie with her pepper tree
Aunt Birdie with the tree that supplied the peppers for the soup

With my aunt and I working together, the pepperpot soup took two hours from preparation to table. The meat would have taken the longest to cook, but in this modern day kitchen, a pressure cooker reduced cooking time by more than half.

I had pepperpot soup last at the Pegasus Hotel in Kingston. It was the best pepperpot soup I’d had in a while. Auntie Birdie’s Pepperpot Soup made me go for seconds.


How to Join the FoodieTuesday Linkup

Join the FoodieTuesday linkup by –

  • Posting a foodie photo on your blog
  • Adding the link to your foodie post in the link tool at the bottom of this post
  • Leaving a comment
  • Tweeting this post using the hashtag #FoodieTuesday

Hope to see you at FoodieTuesday!

 Loading InLinkz ...

Escoveitch Fish, Red Snapper

There are certain meals that every self-respecting Jamaican cook must know how to prepare, with his or her eyes closed, if need be. One such meal is escoveitch. Typically, escoveitch fish is reserved for fish but chicken can be used as well. I prefer fish – red snapper or king, but porgies or any type of fish that is suitable for frying can be used.

Escoveitch refers to a way of cooking, or more specifically marinating fish in a vinegar sauce. Also known as escabeche, it likely came to Jamaica by way of the Spanish.

Escoveitch fish is one of my favorite meals. It is also the only meal my mother taught me to make. I had picked up how to cook everything else, by osmosis I guess but was insecure about my escoveitch fish-making skills. Once I realized how simple it was, I made it over and over.

Escoveitch Fish


Write a review

Print

Ingredients
  1. 2 lbs. red snapper or king fish, cut is slices
  2. 2 tsp. freshly ground black pepper
  3. 1/2 tsp. whole black pepper
  4. 3 tsp. salt
  5. 1 medium Scotch bonnet pepper, cut in strips
  6. 2 large onions, sliced
  7. 1 tsp pimento berries
  8. 1/2 cup oil (for frying)
  9. 2 cups vinegar
  10. 2 limes or lemons
  11. 1 small chocho (chayote or christophene), cut in strips
  12. 1 small carrot, cut in strips
Instructions
  1. Clean fish and wash thoroughly in large bowl with water and lime juice mixture.
  2. Dry fish, place on paper towels to absorb any remaining liquid.
  3. Mix black pepper and salt.
  4. Rub the fish lightly on both sides and on inside with salt and black pepper mixture.
  5. Put on paper towels.
  6. Heat cooking oil in skillet and fry fish on both sides until crisp and golden brown, about 3-5 minutes.
  7. Place fried fish into a glass dish.
Marinade
  1. In a saucepan, add vinegar, onions, Scotch bonnet strips, pimento berries, chocho and carrot strips.
  2. Boil for 2-3 minutes then lower heat and let simmer until onions are soft.
  3. Remove and let cool.
  4. Pour marinade over fish and let cool overnight, or at least an hour. Marinating overnight allows the fish to absorb the flavors.
  5. Escoveitch fish can be served with a variety of starches - from rice to bammie (a cassava flat bread).
Notes
  1. Paper towels will keep the fish dry so that it doesn't pop when placed into the hot oil.
  2. Escoveitch fish can be made a day in advance.
InsideJourneys https://insidejourneys.com/

I’ve yet to try escoveitch chicken. I can’t imagine how chicken stands up to being marinated in vinegar, what the flavors will be like, but I’ll post a recipe once I give it a try.


Have a foodie post you’d like to share? Join the #FoodieTuesday linkup and add it here  –

  • Add the link to your foodie post in the link tool below.
  • As a courtesy, please include a link back to this post.
  • To make it a fun linkup, don’t forget to leave a comment here and comment on as many posts as you can.
  • If you Tweet, G+, Facebook use the hashtag #FoodieTuesday.


 Loading InLinkz ...


Red Pea Soup

Soup, especially red pea soup, is comfort food to me. I make it when it rains or snows, when it’s cold or when I need a pick-me-up. Sometimes, I make it just because.

I love soup. I love the convenience of it. Even cleanup is simple as there’s only one pot. The only thing to master about making soup, however, is timing. Too little and you end up with a broth; too much and you get something close to porridge. I like mine after the peas and potatoes have broken apart, giving the soup ‘body.’

Soup was a typical Saturday meal in our house. When the butcher brought fresh beef, we’d have beef soup. Otherwise, it’d be chicken, pig’s tail, corned beef, or a combination. And there was always some type of pea or bean – pigeon (or gungo), red, split, etc., vegetables, yam, potato and dumplings or spinners.

Red Pea Soup
Bubbling soup

Soups made from a variety of meats or vegetables are typically found on menus in restaurants, cook shops and street vendors. Expect to see corn, cow skin or foot, chicken foot, crayfish (or janga), fish (popularly called fish tea, not fish soup), pepperpot, etc. The star of any gathering, from weddings to wakes, is mannish water, which is also called goat soup or goat belly soup. It’s made from, you guessed it – goat, including the innards.

Red Pea Soup


Write a review

Print

Ingredients
  1. 1 or 2 cups peas (I love a lot of peas in my soups so I usually use 2 cups)
  2. 1 lb. beef or beef bones (or other meat - or leave out the meat for a meat-free soup)
  3. 1 or 2 medium carrots (chopped)
  4. 1 sprig of thyme
  5. 1 stalk of scallion
  6. 1 Scotch Bonnet pepper
  7. 1 tbsp. Pimento Berries
  8. 2 cloves garlic
  9. 1 large Irish potato (cut up in large chunks)
  10. 2 tbsp. coconut milk (optional)
  11. 2 sprigs Parsley (optional)
  12. 2 Bay leaves (optional)
  13. Water – enough to cover peas and meat
  14. Salt and freshly ground black pepper to taste
  15. Noodle soup (optional)
  16. Spinners (recipe follows)
Instructions
  1. Pick out defective or broken peas and wash. Soak overnight. The next day, drain off the water, pour peas into a stockpot, cover with cold water, add garlic and salt to taste and put to boil. (If you’re unable to soak peas overnight, wash, add enough cold water to cover and put to boil.)
  2. Wash meat and add to pot when water begins to boil.
  3. Cook for about an hour or until peas are soft.
  4. Add seasonings – pimento, scallion, Scotch Bonnet, black pepper, and coconut milk.
  5. Peel potato and carrots, chop and add to soup.
  6. Make spinners (recipe below) and add.
  7. Add thyme, parsley and Bay leaves (tie together with kitchen twine or put in cheesecloth). Cover and let cook for about an hour or until done.
  8. Remove Bay leaves, parsley, thyme and pimento beans before serving.
InsideJourneys https://insidejourneys.com/

Spinners (Dumplings)


Write a review

Print

Ingredients
  1. ½ cup flour
  2. 1 tsp salt
  3. 5 tbsp water
  4. 2 tsp butter (optional)
Instructions
  1. Combine butter with flour, blend thoroughly.
  2. Add salt.
  3. Add water slowly and mix until you have a doughy consistency.
  4. Break off small piece and roll between both hands to make the spinners.
  5. Each should be about 2 inches long. Place slowly into soup.
  6. Cover and let cook.
InsideJourneys https://insidejourneys.com/

Have a foodie post you’d like to share? Join the #FoodieTuesday party and add it here  –

  • Add the link to your foodie post in the link tool below.
  • As a courtesy, please include a link back to this post.
  • Leave a comment and do the same for the other posts.
  • If you Tweet, G+, Facebook use the hashtag #FoodieTuesday.


 Loading InLinkz ...


Foodie Tuesday: Otaheiti Apples

Otaheiti apples came to Jamaica and the Caribbean from the Pacific islands. Bright red, sometimes pink in color, they have a texture that reminds me of cotton candy. Some varieties are pear-shaped, others are slightly round; some have a mild flavor, others are quite sweet.

Otaheiti apples are also called Jamaican apple and cocoplum here; pommerac and rose apple in parts of the Caribbean.

Otaheiti Apples
Otaheiti Apples

Otaheiti apples have about 100 grams of water. They are also excellent sources of Vitamin C, calcium, thiamine and riboflavin. Because of their high water content, they will last only a few days if they’re not refrigerated, slight more if they are.

Otaheiti Apples
Apples

During the season, which runs from about December/January until about May, trees laden with fruits are everywhere. They have to be picked quickly before the birds get to them, like they did in the photo above. They’re bagged and sold by street vendors or in the markets. Otaheiti apples can be used in salads, juices, preserves and to make wine.

How to Make Otaheiti Apples Juice

2 dozen otaheiti apples
4 thin slices ginger
1/4 cup sugar (optional)
4 tbsp lime juice

Directions

Place ingredients in blender and blend until smooth.
Strain into iced glass or over ice cubes.
Decorate with otaheiti apple slices or mint leaves.
Serves 6.

Recipe from Norman Shirley via JamaicanEats.


Have a foodie post you’d like to share? Join the #FoodieTuesday linkup and add it here  –

  • Add the link to your foodie post in the link tool below.
  • As a courtesy, please include a link back to this post.
  • Leave a comment and do the same for the other posts.
  • Use the hashtag #FoodieTuesday when you Tweet, G+, or Facebook.

 Loading InLinkz ...


Foodie Tuesday: Grater Cake

Jamaica produces about 95 million coconuts each year – a large number of which is consumed locally. The mature fruit forms the basis for confectioneries such as grater cake, gizzada, and drops that are popular among Jamaicans. These coconut treats turn up in grocery shops, in the baskets of itinerant food sellers and on fancy tables.

Pink & White Grater Cake
Pink topping

A few weeks ago, I attended an event and was pleasantly surprised to see grater cakes among the sweets on the dessert table. Grater cakes are made primarily of sugar and grated or shredded coconut with a little almond essence. It’s relatively easy to make and perhaps because it’s mostly sugar, satisfies the sweet tooth.

Granny is
fried dumplin’ an’ run-dung,
coconut drops an’ grater cake,
fresh ground coffee smell in the mornin’
when we wake.
– From the poem, Granny is, by Valerie Bloom

In the old days, we made grater cake with wet sugar, which is raw or unrefined sugar, also called Muscovado sugar. Wet sugar isn’t as popular as it used to be so now we use granulated (white) sugar.


How to Make Grater Cake

Ingredients

3 cups dried or shredded coconut
2 cups granulated sugar
1/4 cup water
1/8 teaspoon almond essence
1/4 teaspoon salt
1 teaspoon red food colouring (optional)

Directions

Peel off the outer layer (brown portion) of the dried coconut, wash, grate and set aside.
Combine grated coconut, granulated sugar and water in a pot and put to boil. Reduce to medium flame, mix in the almond essence and the salt. Stir constantly until mixture thickens.
Remove a 1/3 of the mixture and add a small amount of red food colouring to give a delicate pink colour.
Scrape remaining coconut mixture into a greased casserole dish and spread evenly.
Spread the pink coloured coconut evenly over the white mixture.
Set aside for 25-30 minutes or until sufficiently cooled.
Cut into squares and serve.

Recipe from gracefoods.com

Have a foodie post you’d like to share? Join the #FoodieTuesday linkup and add it here  –

  • Add the link to your foodie post in the link tool below.
  • As a courtesy, please include a link back to this post, and leave a comment.
  • Please comment on as many posts as you can.
  • Use the hashtag #FoodieTuesday for Tweets, Likes, G+.

 Loading InLinkz ...